
On a typical Saturday morning in neighborhoods across Boca Raton, Parkland, Fort Lauderdale, West Palm Beach, and Jupiter, homeowners often find themselves at their kitchen windows, coffee growing cold, staring at their backyards with a mix of hope and quiet frustration. The lawn looks good. The fence is sturdy. Everything seems… fine.
But “fine” doesn’t host summer barbecues. Fine doesn’t make your kids’ friends ask to hang out after school. Fine doesn’t turn a house into a place people remember.
In my experience, there’s a moment when homeowners realize their backyard isn’t just ordinary — it’s holding them back from the lifestyle they want. And almost always, the next question is: “How complicated is this going to be?”
It’s a valid concern. Most people think pool construction means months of stress, unexpected costs, and that sinking feeling when a contractor says, “We’ve run into a small issue.”
Here’s the difference: fiberglass pool installation works completely differently. Not just a little easier, not just a few weeks faster — it’s a process so smooth that what usually takes four to six months can often be done in just a few weeks.
And it all starts with six simple, surprisingly straightforward steps.
Before we get into how the process works, it helps to understand why fiberglass pools changed the game.
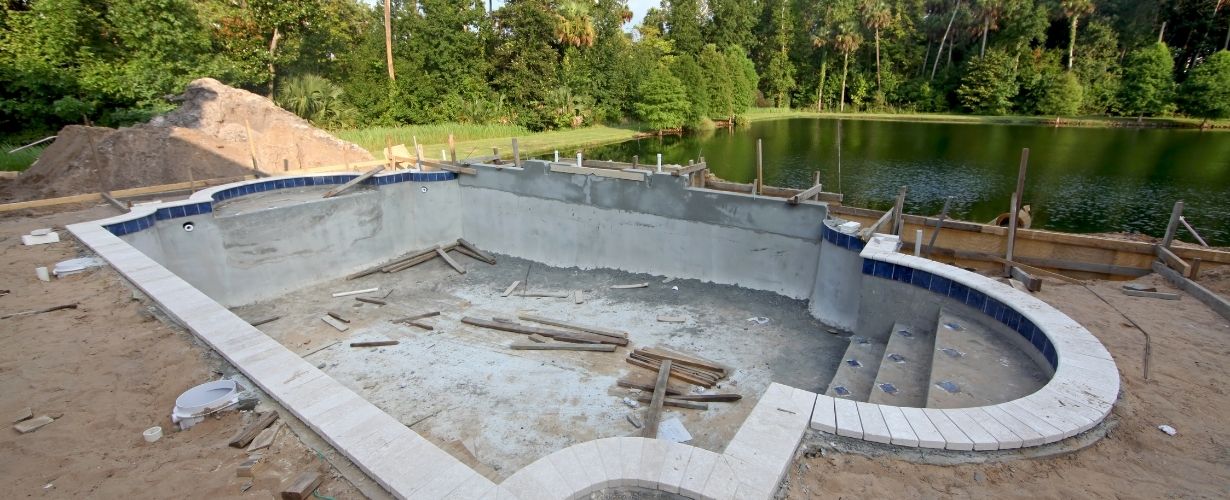
For years, building a pool was a big, complicated task. Concrete pools meant digging a hole, constructing the pool piece by piece, and hoping everything went smoothly. They needed skilled workers at every step, faced constant delays from weather, and often took months—or even longer—to finish. Vinyl liner pools were faster to install but often didn’t last as long and didn’t look as good.
Then fiberglass pools came along and quietly transformed the industry. Instead of building the pool entirely on-site, manufacturers began creating the pool shells in factories where every detail—temperature, humidity, and quality control—was carefully managed. By the time the pool reached your home, it was essentially ready to go, needing only installation.
It’s like the difference between trying to build a car in your driveway versus having one delivered from a factory. You end up with the same result, but the factory-made option is far quicker, simpler, and much less likely to run into serious problems.
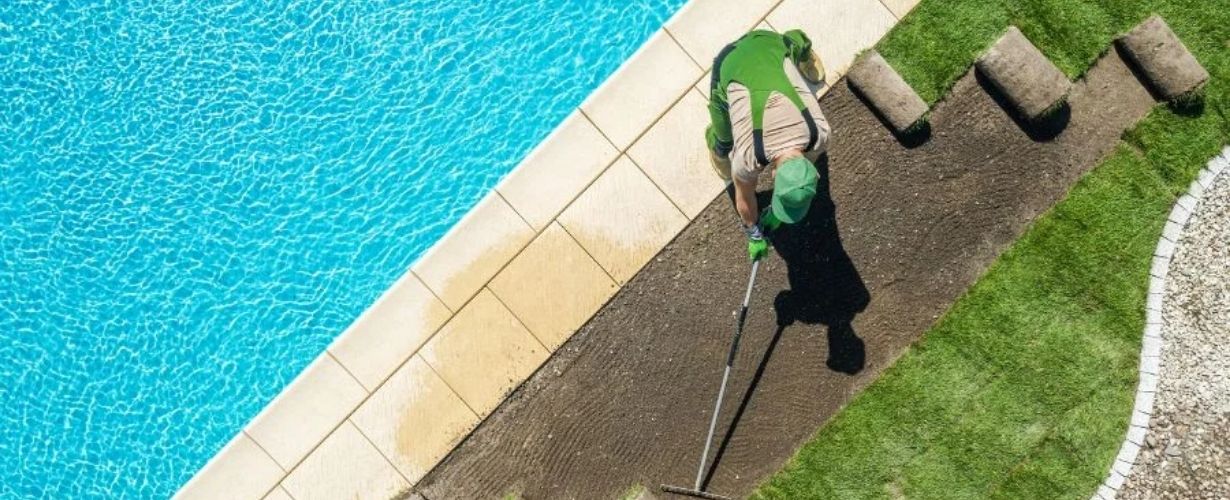
Every pool project starts in the same way: someone stands in their backyard, pointing at empty space, saying, “We were thinking… maybe… here?”
This is the moment that sets top pool companies apart. Anyone can dig a hole and drop in a pool shell, but the best installers know that this stage isn’t really about the pool—it’s about understanding how you live and use your outdoor space.
During the site assessment, experienced installers do more than measure your yard. They ask questions that might seem unrelated at first: Where does the sun set? Which way do the winds usually blow? Where do your kids naturally play? How do you imagine entertaining guests?
These details matter because installing a fiberglass pool isn’t just putting an object in your yard—it’s about creating the heart of your outdoor life. Technically, this involves checking the soil, locating utilities, assessing drainage, and figuring out access for equipment. But the bigger task is making sure your vision of relaxing weekend mornings by the water fits with what your property can actually support.
When companies like Epic Watershapes™ do this assessment, they build a full picture: optimal sun exposure for pool heating, sight lines from your home’s main living areas, proximity to future outdoor kitchens or entertainment spots, and practical access for equipment—without damaging fences or your neighbor’s landscaping.
By the end of this process, you’ll know three things clearly: what’s possible, what’s best for your space, and what it will cost. No surprises. No unexpected expenses halfway through the project.
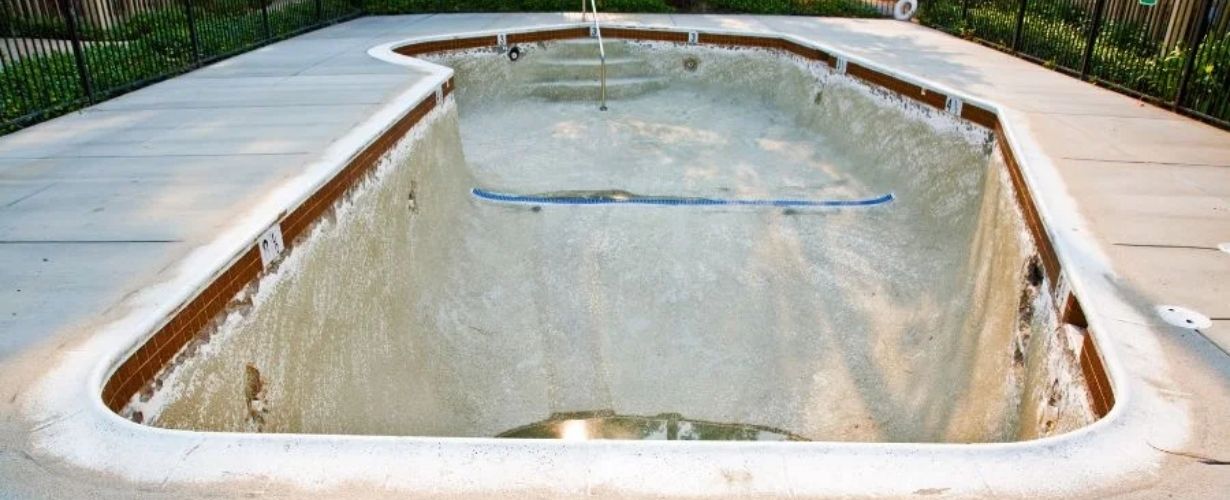
There’s a moment during excavation that makes everything feel real. You’ve signed the paperwork, paid the deposit, and talked for weeks about how the pool will change your backyard. But it all stays abstract until the day an excavator pulls into your driveway and you think, this is really happening.
Excavation is when a fiberglass pool project moves from planning to action. This step also shows one of the biggest advantages fiberglass pools have over traditional concrete pools. With concrete, digging the hole is only the first step in a long construction timeline. With fiberglass, excavation puts you nearly halfway to the finish line.
That’s because the pool itself isn’t built in your yard. The shell is already completed at a factory and ready to be delivered as soon as the hole is prepared.
The dig follows a detailed plan that lists the exact length, width, and depth of the pool, along with extra space for plumbing, electrical work, and the material that will support the shell. For most residential fiberglass pools, this means removing about 40 to 70 cubic yards of soil—roughly three to five large dump truck loads.
Precision matters more than many homeowners expect. Unlike concrete pools, where changes can be made as construction goes on, fiberglass pools require the hole to closely match the shell’s size. If the hole is too shallow, the pool won’t sit correctly. Too deep, and you’re paying for extra fill. Too wide, and you risk future settling issues.
To avoid these problems, today’s excavation crews use laser levels and GPS-guided equipment to dig with high accuracy. The bottom of the hole is shaped for proper drainage, compacted to reduce settling, and usually finished with a gravel base to add strength and allow water to move away from the pool.
In most cases, excavation takes one to three days. The exact timing depends on soil type, access to the yard, and weather. Sandy soil, like much of Florida’s, is usually easy to work with. Areas with clay, rock, or a high water table may require extra steps—issues that should already be identified during the initial site evaluation.
Excavation is when the project starts to feel serious, but the foundation is what makes everything permanent.
At this stage, the installer creates a flat, solid base for the fiberglass pool shell to sit on. Most of the time, this means spreading and compacting a layer of gravel—usually crushed stone or pea gravel—that supports the pool and allows water to drain away.
This gravel layer does several important jobs. It spreads the pool’s weight evenly, helps prevent sinking that could damage the shell or plumbing, allows groundwater to move away instead of pushing against the pool, and provides a stable surface that can handle small changes in the soil.
Many homeowners don’t realize how important this step is. An empty fiberglass pool can weigh between 8,000 and 15,000 pounds. Once it’s filled with water, that weight jumps to 80,000 to 150,000 pounds or more. That’s like placing multiple fully loaded dump trucks in your yard. The base underneath has to support that weight evenly.
To get it right, professional installers use laser levels along with manual checks to make sure the gravel base is flat within about a quarter of an inch across the entire pool area. The gravel is compacted in layers, with frequent checks and adjustments along the way.
This work is slow and detailed. Once the pool is in place, you’ll never see it—but it plays a huge role in how long the pool lasts. A properly prepared foundation can mean decades of trouble-free use, while mistakes here can lead to issues much sooner.
In good conditions, this step usually takes about one day. However, rain can cause delays since wet gravel doesn’t compact well and wet soil can make it unsafe to operate equipment.
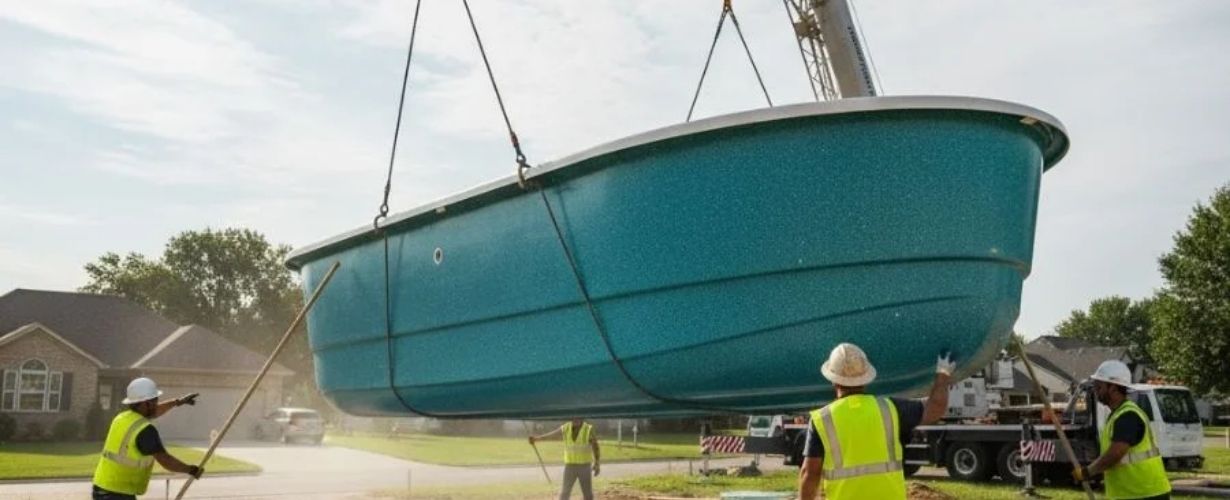
If you want to see the biggest benefit of a fiberglass pool, delivery day says it all.
Early in the morning, a special truck pulls up carrying your pool shell. If you picked a color—and today’s fiberglass pools come in shades like blue, gray, and pearl white—this is the first time you see it at full size.
A crane then lifts the shell and carefully moves it over the dug-out area. Even though the pool can be 30 feet long and weigh several tons, skilled operators lower it into place with impressive accuracy. Installers on the ground guide it using ropes and simple hand signals.
This is the moment everyone notices. Kids rush outside to see it. Neighbors suddenly find reasons to stop by. It’s the most exciting part of the process.
This is also when fiberglass pools show their biggest advantage: the pool is basically finished. The surface is done. Steps are already built in. Features like benches, tanning ledges, or spa areas are part of the shell. There’s no long wait for concrete to dry or surfaces to be added later.
After the shell is set, the crew checks that everything is level and positioned correctly. They make sure it sits at the right height, lines up with plumbing, and fits the planned deck or landscaping.
From delivery to placement usually takes about three to five hours, as long as the weather cooperates. By the end of the day, you’ll have a real pool shape in your backyard—and it may feel so unreal that it’s hard to stop thinking about it.
This is the stage where fiberglass pool installation moves from eye-catching to detail-focused. It’s also the point where quality work clearly separates experienced professionals from inexperienced crews.
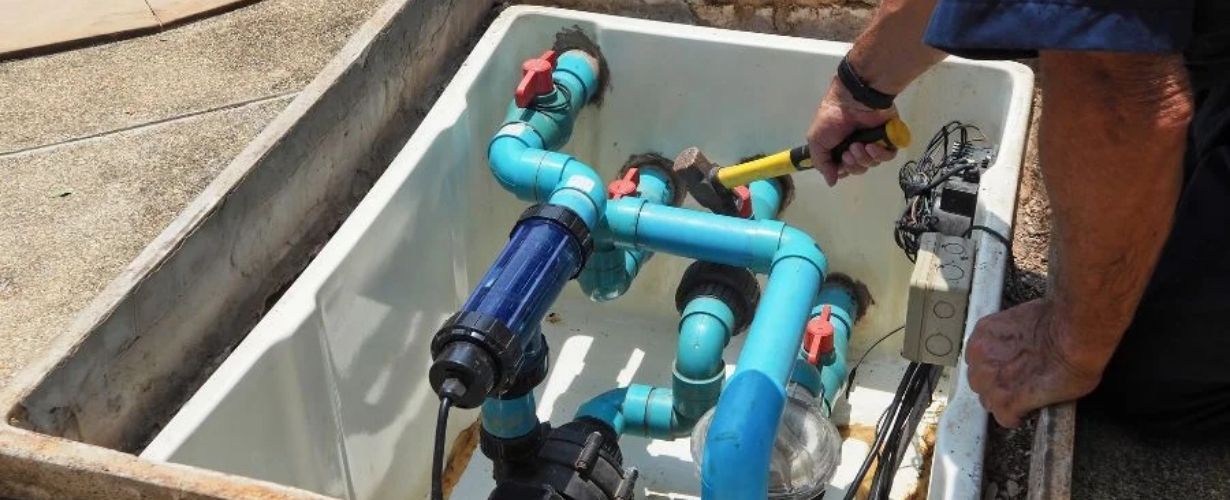
The work is done in planned steps. First, while the pool shell is empty or has just a small amount of water for support, the team connects the plumbing. This includes the skimmer that pulls debris from the surface, the main drain at the bottom of the pool, return jets that send clean water back into the pool, and any added features such as spa jets, waterfalls, or in-floor cleaning systems.
Every connection must be sealed, secured, and tested before it is covered. Fixing a leak after pipes are buried is far more costly than correcting it during installation.
As the plumbing is completed, backfilling begins. This part of fiberglass pool installation requires special care. Material is added around the outside of the shell in layers while water is added inside the pool at the same time. This keeps pressure balanced on both sides of the fiberglass.
This balance is critical. Even though fiberglass is strong, uneven pressure can cause the shell to bend or fail. The crew adds a few feet of water inside the pool, then backfills to the same height outside. This process is repeated until the pool is fully supported.
Gravel is usually used for backfill because it provides good support and drainage. It is compacted as it’s placed to prevent settling later. Any empty spaces around the shell must be filled evenly to keep the pool stable and prevent movement or damage.
At the same time, electrical work is completed. This includes wiring for the pump, filter, heater if included, pool lights, automation systems, and any extra features like waterfalls or fire bowls.
Many high-end installations also include a groundwater relief pipe. This helps release pressure if the water table rises under the pool, which is especially important in areas like Florida where groundwater levels can change seasonally.
This phase typically takes two to three days, as long as there are no issues with underground lines, bad weather, or equipment delays.
The pool shell is set. All systems are connected. Backfilling is done. At this stage, the pool is technically ready to be filled and used.
What turns it from a simple pool into a space that truly upgrades your home is the finishing work.
Coping is the material placed along the top edge of the pool. It creates a clean transition between the pool and the deck. For fiberglass pools, coping options often include natural stone like travertine or granite, pre-made concrete pavers made for pool edges, or poured concrete that can be colored or patterned to match your style.
Coping isn’t just decorative. It gives swimmers a safe grip when getting in and out, helps stop water from getting behind the pool shell, protects the surrounding soil, outlines the pool’s shape, and sets the overall look of the area.
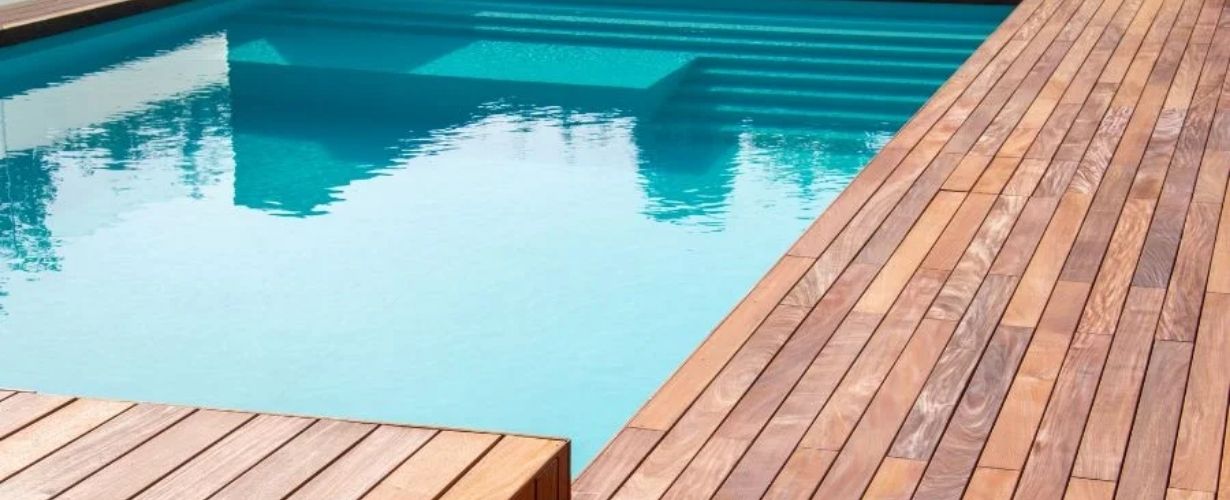
Decking is where the pool area really comes to life. Instead of plain concrete, higher-end builds use materials that make the space more comfortable and inviting. This can include stone pavers that stay cooler in hot weather, textured concrete that reduces slipping and allows for many color choices, or composite decking that looks like wood without the upkeep.
A good decking layout also plans for proper drainage, enough room for chairs and walking paths, space for dining or relaxing, connections to outdoor kitchens or fire features, and flexibility for future landscaping.
This phase often includes added features such as safety fencing, landscaping for privacy and appeal, LED lighting for nighttime use, water features like jets or waterfalls, and smart controls that let you manage the pool from your phone.
Finishing work usually takes one to two weeks, depending on the design and added features. Once it’s done, you don’t just have a pool—you have a complete outdoor living space built around comfort, style, and how your family enjoys their time outdoors.
Let’s take a step back and point out something that often gets buried in the details: installing a fiberglass pool isn’t really just about the pool.
It’s about choosing to give your outdoor space the same care you’ve already given your home inside. It’s about deciding that a backyard that’s been “good enough” should become a place people remember. It’s about realizing your kids won’t be kids forever, and that creating a backyard their friends love coming to actually matters more than you might say out loud.
It’s also about those small moments—like a Sunday morning when you notice your neighbors aren’t just people you greet anymore, but people who gather at your place because your backyard naturally brings everyone together. Yes, resale value matters, but at its core, this is about enjoying the home you’ve worked hard for.
Fiberglass pool installation makes this easier because it removes what stops most people from moving forward: the mess, delays, and uncertainty of traditional pool builds. When the timeline is weeks instead of months, when each step is clear, and when you can picture how the process will unfold, the decision feels far less overwhelming.
Here’s a simpler, more natural version with the same meaning and emotion, but easier to read and very human in tone:
After spending years in this industry, I’ve noticed something important: people don’t regret putting in a pool. What they regret is waiting too long. They regret the summers that slipped by as their kids grew up, the get-togethers they never hosted, and the memories they kept putting off. Many thought “someday” would come, until they realized that someday quietly turned into “too late.”
The six steps of fiberglass pool installation I’ve shared here aren’t hard to understand. They’re straightforward, proven, and faster than most people expect. The hard part isn’t the work itself—it’s deciding to start.
If you’re standing in your kitchen on a weekend morning, coffee getting cold, looking out at a backyard that’s “okay” but not what you pictured, you already know the answer. It’s not about whether this will happen. It’s about when you’ll stop researching and start enjoying life.
Right now, in places like Boca Raton, Parkland, Fort Lauderdale, West Palm Beach, or Jupiter, there’s a family enjoying a pool that didn’t exist six weeks ago. Kids are laughing in the water. Friends have dropped by. Someone’s cooking on the grill. Music plays softly while the sound of splashing fills the yard.
That family made a choice. They didn’t wait for the perfect moment or complete certainty. They decided to build a space where real life could happen. How did they get there? Six simple steps, skilled professionals, and a few weeks of work.
And the end result? A backyard they wish they had built years ago.
If you’re in the West Palm Beach area and want to know what a professionally installed fiberglass pool can really add to your home, Epic Watershapes™ offers consultations that are clear and helpful—not just quick price quotes. We look at your property, talk through your ideas, and explain the process, timeline, and costs in a straightforward way. No pressure, no hidden details—just honest guidance on your options.
The best time to put in a pool may have been years ago. The next best time is today.
About the Author:
Henry Pierce is co-owner of aquaelitepool.com, and he brings 15+ years in luxury construction expertise to Aqua Elite Pool, combining engineering precision with designs that transform ordinary spaces into environments where families naturally gather and memories happen. When he’s not building pools, he spends time with his family, reading good books or playing tennis.